How it works
Full size to flat in a few minutes, with your bare hands. Here's every step — the same ones on your printed sheet.
Filmed on a pre-production sample — shipping units have orange wheels.
Flat in three moves
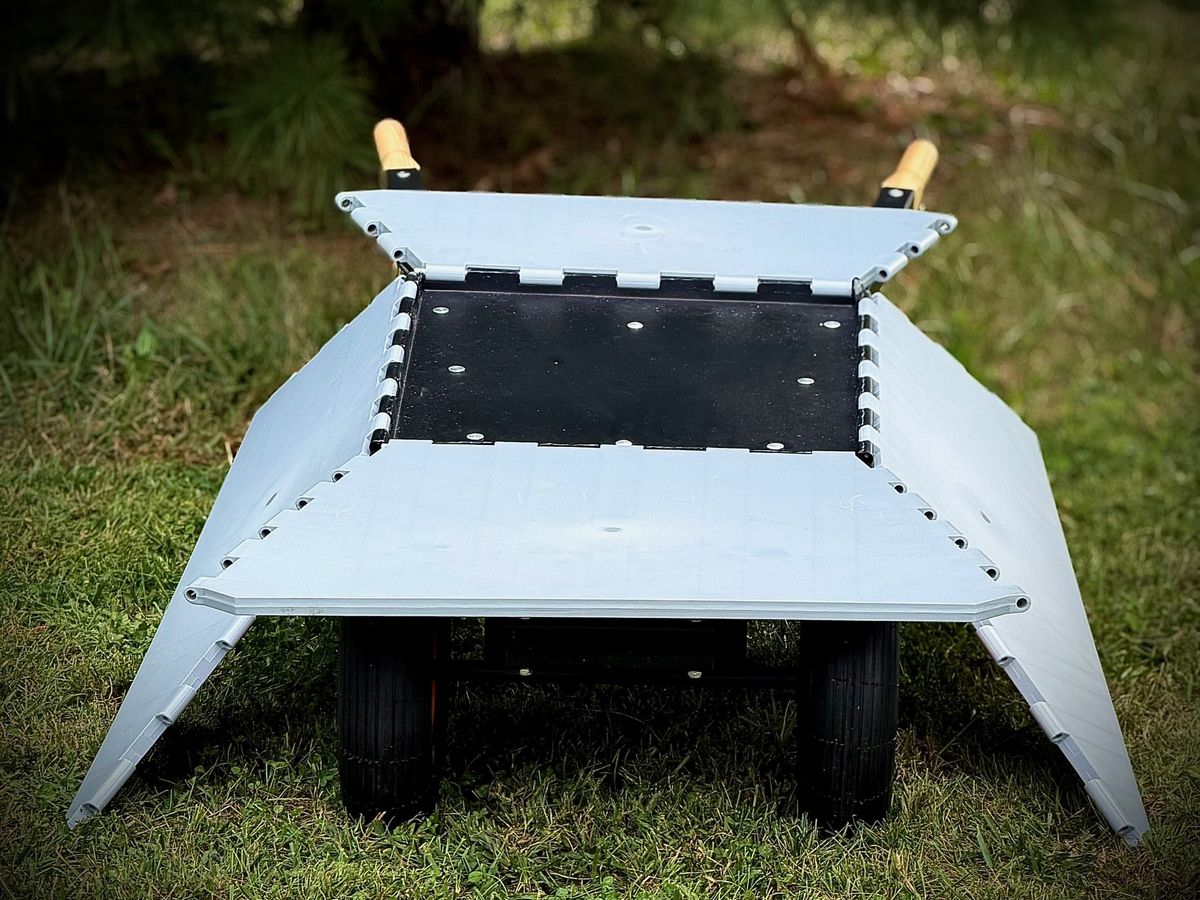
1 · Pull the rings
Two colors, two jobs. Pull the orange pull-ring rods to free the tub side panels from each other, then the black pull-ring rods to free them from the base. No tools, just hands.
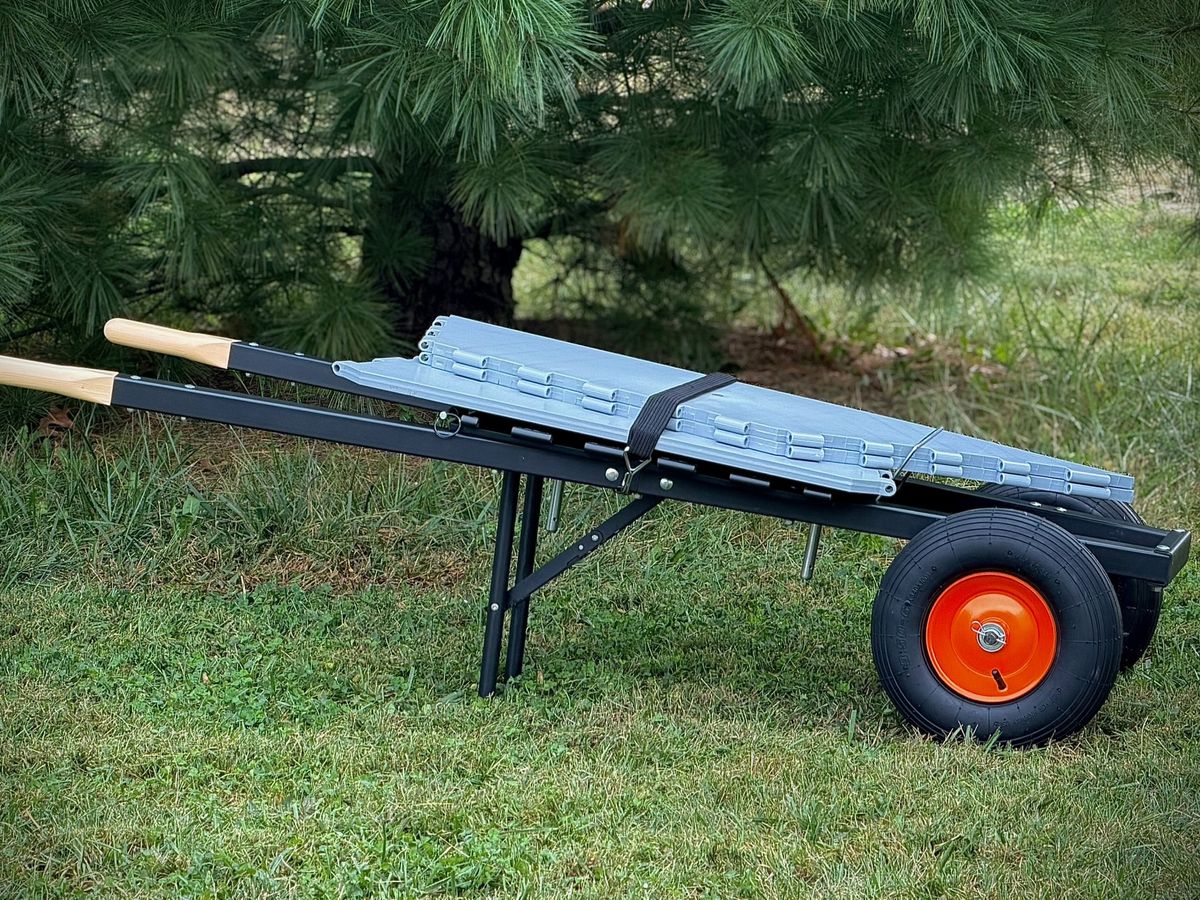
2 · Stack and strap
Stack the panels flat on the base: smallest first, then the front panel, then the long sides laid points-down so they catch the metal bar. Cinch the stack with the strap stored around the handles.
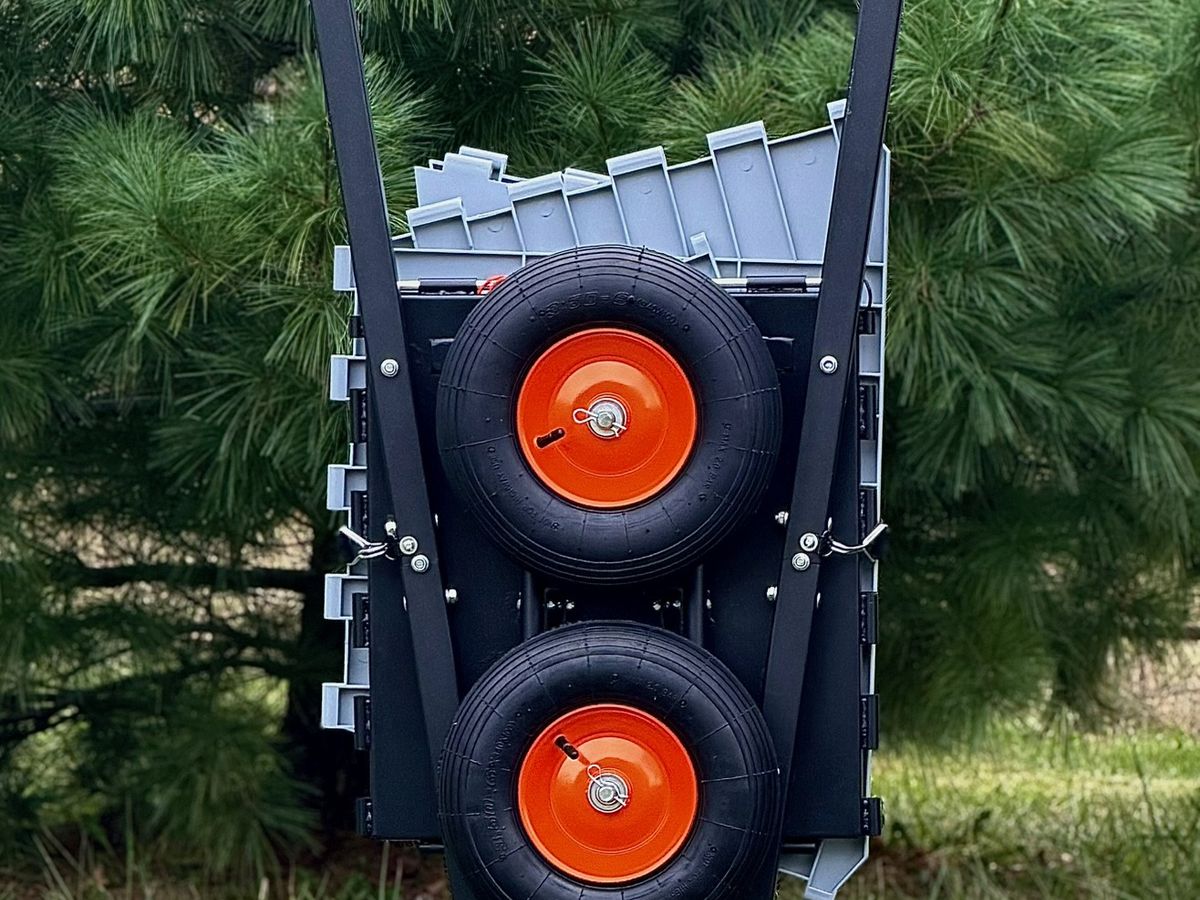
3 · Pin the wheels
Pull both wheels off the axle and pin them onto the storage rods at the back of the base with the cotter pins. Now the whole thing is under ten inches thick.
Step by step: collapsing it
-
Empty the tub and set the wheelbarrow on level ground.
-
Pull the orange pull-ring rods to release the tub side panels from each other.
-
Pull the black pull-ring rods to free the panels from the base.
-
Hang all of the rods from one black rod at the top of the metal base, then insert that rod back into the base hinge.
-
Stack the panels flat on the base — smallest panel first, then the front panel.
-
Lay the long side panels on top, points down, so they catch the metal bar.
-
Take the strap stored around the handles and cinch the stack down tight.
-
Pull both wheels off the axle.
-
Pin the wheels onto the storage rods at the back of the base using the cotter pins.
Putting it back together is the same steps in reverse: wheels on the axle first, then panels, then rods. Remember the colors — orange rings join the side panels, black rings join them to the base.
First time putting it together? The owner’s manual has the full instructions: every part in the box, assembly step by step, and the safety checks before each load. Printable PDF included.
Read the owner’s manualWorth remembering
- Orange rings = side panels. Black rings = base. That's the whole system.
- The strap lives around the handles, so it's always where you need it.
- The cotter pins hold the wheels on the storage rods — don't skip them for travel.
- Hose it off before you collapse it; the poly panels dry fast.
- First time through, scan the QR code on your instruction sheet and follow along with the video.
250 lb
load capacity
under 10″
collapsed thickness
under 60 lb
unit weight
90-day
limited warranty
Ready when February is
Production starts in January. Join the waitlist and you'll be first in line.
Join the Waitlist